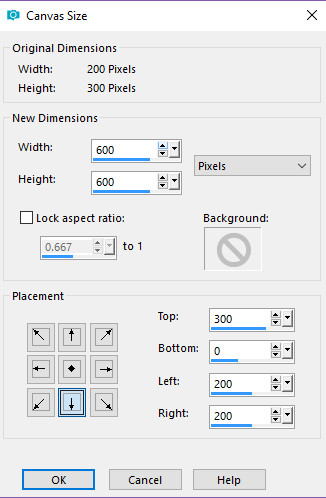
title image

Colour Animated
Sinedots Tutorial

image
This tutorial was created for PSP7 July 14th 2002©
Copyright Artwork by EssexGirl and was rewritten for PSP2018
please do not copy it, or put it anywhere else without my written permission.

Filters and programs used in this tutorial :-
Paint Shop Pro
Dragonfly's Sinedots II
Silver...from Flaming Pear's sextet(optional)

Materials :-
There is a text file included in the zip, if you don't know where to place the items.
My sg_sinedots-presets.cfg a zip file is Here it contains some extra presets

some images have been made smaller to shorten file size


Step 1.
Open a new Image 200 x 300 transparent and flood fill
with a dark colour, the colour isn't important as it can
be changed before animating if you want to do so.
Add a new layer

Go to Effects...Plugins...Dragonfly...Sinedots...
Open the sg_sinedots-presets.cfg and choose the mauve-checks preset
If you are new to sinedots and don't know how to open
the .cfg file click HERE for more information

Some presets use different 'blend' settings and it is
important for this tutorial to make sure that the blend
in the sinedots setting is set to 'screen' like this:-

image

This is the sinedots preview

image

In psp the black background is on the layer below the sinedots

image


Step 2.
Go to Layers...Duplicate...
Image...Mirror Horizontal... (Mirror in earlier versions)
Go to Layers...Merge...Merge down...

image


Step 3.
Go to Image...Canvas Size...
and change the canvas size to 600 x 600
Tick the centre bottom box in the placement section

image

Make your background layer active and flood fill
with the dark colour that you are using then make
the sinedots layer active again.


Step 4.
Go to Layers...Duplicate...
Image... Mirror Vertical... (Flip in older versions)
Layers...Merge...Merge Down...
Your image should look like this

image


Step 5.
Go to Layers...Duplicate...
Image...Free Rotate...
Rotate by 90° any direction,
the 'all layers' box should be unticked.

image

Go to Layers...Merge...Merge Down...


Step 6.
Duplicate the merged layer, then go to
Image...Rotate...this time change the rotation to
45° any direction. Rotating by 45° will
make the image on this layer slightly fuzzy, it will
need sharpening after the rotation so go to
Effects...Sharpen...and Sharpen...
No merging this time.

image


Step 7.
I resized my image at this point, before making the
frames for the animation. It's up to you whether you do
this, it depends how large you want the animation to be.

Image...Resize...Tick the 'all layers' box.
Resize the image by 75% (or size of your choice)
Resample using bicubic


Step 8.
If you want to change your background colour,
make that layer active and flood fill with your choice.
I added my border before making the animation frames
so that it would be exactly alike on each one. If you
don't want a border around your animation
you can omit the rest of this step.

Make the background layer active.
Go to Selections...Select All...then
Selections...Modify...Select Selection Borders...
border width=10 pixels, inside, anti-alias= unticked.

image

I applied Flaming Pear's 'Silver'
(effects, plugins, Flaming Pear, Silver)
I just hit the random dice a few times,
until I found s setting that I liked.

If you prefer you can use another program
like Eye Candy or SuperBladePro, or just
flood fill with a colour and add an inner bevel

image


Step 9.
Hold down the shift key and hit D 3 times.
You now have 4 identical images, each with a
background layer and two sinedots layers.

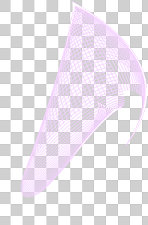
Each of the sinedots layers needs to be coloured
seperately, so make one of the sinedots layers active.
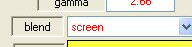
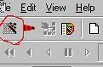
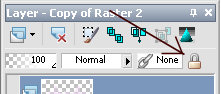
My current favourite colouring method
for sinedots, is to lock the transparency of the
layer by clicking the padlock, as shown in the
following screenshot, then painting over the image with
a large brush in the chosen colour, or gradient. Transparent
areas in the layer are protected from the paint.

image

Repeat this for each sinedots layer.
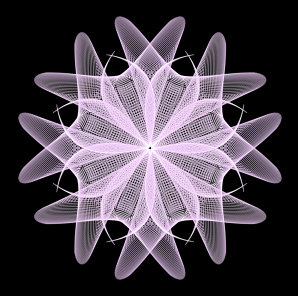
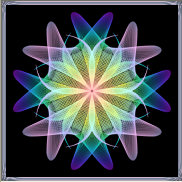
The choice of colours is up to you.
You can use plain colours, gradients, patterns,
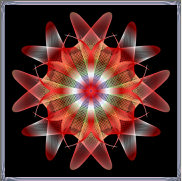
or a mixture and you can either stick to a colour
scheme (eg reds and yellows) or a variety.

Do some experimenting to find combinations that appeal
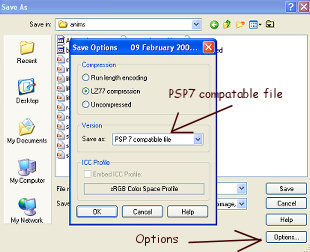
to you. We will save them in psp format, so that the
colours can be changed if you don't like the result
when we try the animation out in Animation Shop, or
if you want to make another one in different colours.

When you are happy with your colours, click the padlocks
on the layers again to unlock the transparency

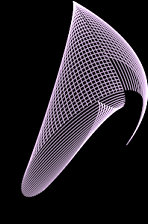
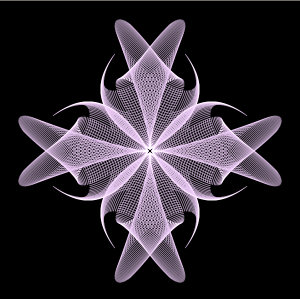
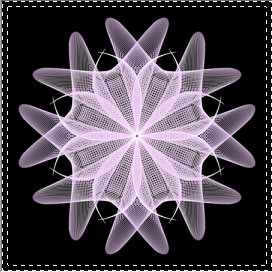
I think these work best with a dark background colour,
but it is possible to use a light background. If you do
so you will need to add a drop shadow to each of the sinedots
layers. My example at the end of the tutorial has a drop shadow
added to each of the sinedots layers using these settings :-
horizontal and vertical =1, opacity=75, blur=1, colour= black


Step 10.
When you are ready save your images in psp format
naming them something like 'frames 1, 2, 3 and 4
They need to be PSP7 compatable for Animation Shop to
be able to open them, so on the save dialog box click
the Options button, then choose PSP7 compatable file

image

These were my frames

image image

image image


Step 11.
Open up Animation shop
For this animation the layers need to be
merged into single frames, so look under
File...Preferences...General Program preferences...
On the 'Layered Files' tab use these settings

when opening a file containing multiple layers-- Merge layers into a single frame

You can change back to your usual
preference when you finish this tutorial.

Click on the animation wizard in the top left corner

image

These are the options to select on the windows that follow
'same size as the first frame', click next
'transparent', click next
'centred in the frame', and 'canvas colour', click next.
Yes to repeat indefinitely and 40 in the time box,
(if you want the changes in colour to be faster or slower
you can adjust the number lower to make the animation
faster and higher to make it slower). Click next.
Click on add image and navigate to where you put your
four images. Select each one, or hold down the Ctrl key
and select them all, but click them in reverse order if
you do it this way. click next. Click 'finish'
To see the animation working go to
View...Animation


Step 12.
If you like your result save it using the default settings.
If you want the colour change to be faster, or slower
Go to Edit...Select All...(Ctrl+A)
Animation...Frame Properties...
Lower the Display time number to make the changes faster,
or raise it to make the changes slower
If you want to change the colours you can open your 4
images again in PSP and try some different colour variations.

You can get lots of variations try with a
different sinedots preset, or change the
settings on the rotating mirror.


I hope you enjoyed this tutorial.
To see my other tutorials click Here

If you wish to contact me you can find an email address to use included on my Site Map

Home