image

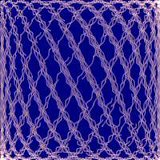
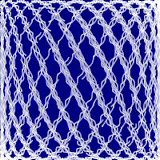
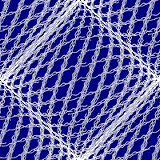
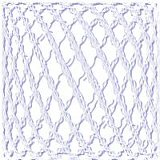
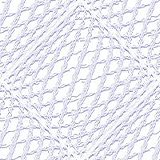
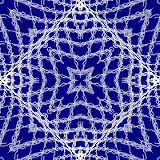
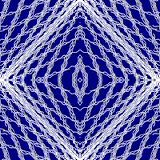
Net Tiled Background Tutorial

This tutorial shows how to make the
net background tiles shown on this page.

This tutorial was created 15th March 2003©Copyright Artwork by EssexGirl
Updated for use with PSPX9 21st July 2017
please do not copy it, or put it anywhere else without my written permission.

Filters and programs used in this tutorial :-
Paint Shop Pro
Dragonfly's Sinedots II

Materials :-
There is a text file included in the zip, if you don't know where to place the items.
My net tile.cfg Here

some images have been made smaller to shorten file size


Step 1.
The colours that I have used for my tiles are dark blue and white
Feel free to substitute these with your own colour choices.

Make your palette background colour #000080 (navy)
and the foreground colour #FFFFFF (white)

Open a new image 200 x 200 transparent and
flood fill with the background colour.
Add a new layer, then go to
Effects...Plugin Effects...Dragonfly...Sinedots....
open the sg_net tile.cfg and choose 'challenge_Y'
If you are new to sinedots and don't know how to open
the .cfg file click HERE for more information

Some presets use different 'blend' settings and it is
important for this tutorial to make sure that the blend
in the sinedots setting is set to 'screen' like this:-

image

image

optional: Go to Layers...Duplicate...then
Go to Layers...Merge...Merge Down...
This will thicken the lace, but if you prefer
a finer version omit this duplication and merging.


Step 2.
Make a duplicate image (shift+D) minimise it.
We will use this later, for our second tile.

At the moment the sinedots image is pink. To change it to white
(or your choice of colour), open the layers palette and click the
padlock at the far right of the merged layer, it will turn blue.

image

This will lock the transparency of the layer and protect the transparent
areas while we flood fill. Flood fill or paint ove it with a large brush
in white(or your colour choice).

image

When you have the layer flood filled in your choice of colour,
click the padlock again to the unlock it's transparency.


Step 3.
Go to Effects...3D Effects...Drop Shadow...use these settings
Horizontal=2, Vertical=2, Opacity=50, Blur=1, colour=Black

Go to Effects...Plugin Effects...Simple...Diamonds...

image

*NOTE* For a couple of variations see step 6.

Go to Layers...Merge all...then go to
Image...Resize... make sure that the 'all layers' box
is ticked and resize to the size you want your tile to be.
Mine is 60 x 60. After resizing go to to
Effects...Sharpen...and Sharpen.

image


Step 4.
For the light coloured tile I used white for both the
background and the sinedots image and used a coloured drop
shadow to bring out the net pattern.

Open up the duplicate tile that you minimised earlier.
Make the background layer active and flood fill with white.
Next, make the sinedots layer active, lock the transparency on
the layer (the same as in step 2), flood fill, or paint over
the image with a large brush in white, then lock the transparency.
You won't be able to see the sinedots image for now,
because it is the same colour as the background layer.


Step 5.
Go to Effects...3D Effects...Drop Shadow...
I changed the colour of the shadow to #000080 (navy) which is
the same shade as my first tile's background colour.
The other settings were the same as before.
(Vertical=2, Horizontal=2, Opacity=50, Blur=1.1).

image

Go to Effects...Plugin Effects...Simple...Diamonds...

image

Merge all layers and resize the same as your first tile.


Step 6.
VARIATION
As a variation on this design you could add another step after
applying Simple's 'Diamonds' in step 3 to make a more lacy tile.
Here I applied Simple's 'Pizza Slice mirror' after the 'Diamonds'.

image


And for this one I applied Simple's 'Top Left Mirror' after the 'Diamonds'.

image

There are lots of variations that you can add, experiment with
different combinations, before and after the diamonds step
and see what you can come up with.


I hope you enjoyed this tutorial.
Thankyou to my great testers
To see my other tutorials click Here

If you wish to contact me you can find an email address to use included on my Site Map
Home