|
Step 1.
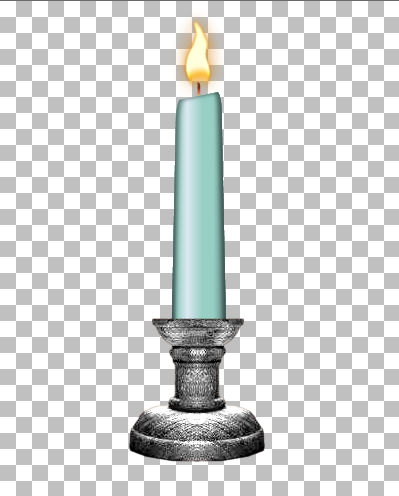
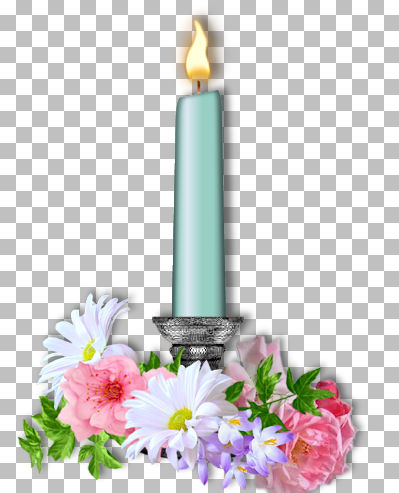
Open the 'candlestick' tube that is in my supplies.
Duplicate and close the original, so that you can re-use it .
There are 4 layers in this tube, the candle-holder in a choice of
silver, gold, or wood and the candle. Decide which colour you want
your candle holder to be and delete the other candle holder layers.
If you want to change the colour of the candle, click on that
layer in the layers palette and go to
Adjust...Hue and Saturation...Hue/Saturation/Lightness...
Move the Hue slider to change the colour. The candle will still be a light
colour, but you can increase the Saturation to make it a richer colour if
you wish, (alternatively you can Adjust...Hue and Saturation... Colorize...
and adjust the levels to your liking)
(If you are doing the 'Keep A Candle Burning' tutorial
the Hue
setting I used was minus 166 (-166), I left the saturation at 0)
When you are happy with the colour of your candle
Go to Layers...Merge...Merge Visible...
Minimise this image for now, we will need it again later
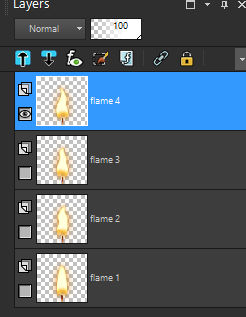
Open the 'candle-flame-single' tube from my supplies
Go to Layers...Duplicate...3 times, so that you have 4 layers.
It will be easier to know which layer I'm talking about if the layers are renamed,
So starting from the bottom (Raster 1) and working upwards, rename
the layers, flame 1, flame 2, flame 3 and flame 4.
Hide the flame 1, 2 and 3 layers by clicking the eye for each of
those layers on the layers palette.
Flame 4 (at the top) should be the only visible layer,
that's the one we will work on first, so if you are not already on
that layer, click on it in the layers palette to active the layer.
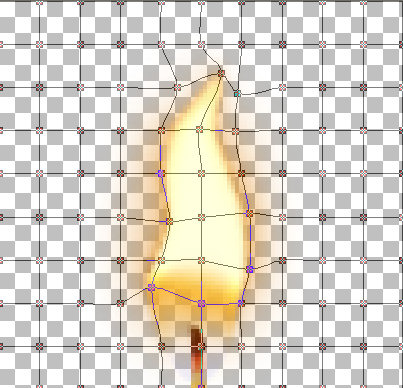
Zoom in on the image, it will make working on the next steps easier.

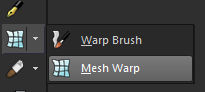
Activate the Mesh Warp Tool
Use these settings:-
Mesh horizontal=9
Mesh vertical=8
Symmetric=unticked
Show mesh=ticked
Edge mode=fixed
Draft quality=High
Final Apply=Best quality
Drag the nodes on the mesh into similar positions as my screenshot.
I have zoomed in on the image to make the positions easier to see.
I know it's difficult to keep jumping back and forth from psp to
the tutorial while you are trying to do this, so feel free to right
click on these screenshots, copy and paste them into psp, so you
can see them while you are working.
Yours don't have to be in exactly the same positions as
mine, just use them as a rough guide.
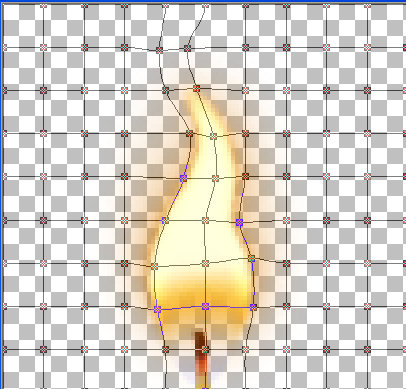
When you are happy with the shape, click
the 'Apply' tick on the toolbar.
|