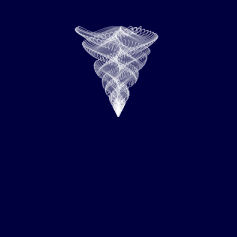
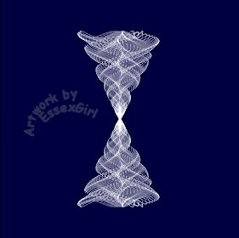
title image

Spinning Top

PSP X

image
This tutorial was created March 17th 2002©Copyright Artwork by EssexGirl
updated for pspX Jan 2007
please do not copy it, or put it anywhere else without my written permission.

Filters and programs used in this tutorial :-
Paint Shop Pro

Materials :-
My selection file Here
Unzip into your selections folder

The sinedots .cfg that I used in my original psp7 tutorial
is Debs DeHaven's, which she gave me permission to use.
*Sadly, Deb DeHaven passed away on May 7, 2005
She wrote lots of great tutorials for PhotoImpact
including several that used the sinedots filter
I don't think her tutorials are available any more.*

some images have been made smaller to shorten file size


This tutorial was originally written for PSP7 and used the Sinedots filter
and PSP's Geometric Effect...Perspective...Vertical. Unfortunately the
Perspective effect works differently in PSP9 and X, this distorts the
sinedots shape too much to use, so I have made a selection file to use
instead, which you can find in the materials zip.

step 1.
open a new image 400 x 400
Flood fill with a dark colour, then add a new layer
Go to Selections...
Load/Save Selection...Load Selection from disk
Load the spinning-top selection
Flood fill the selection with white, then de-select

image


Step 2.
Go to Layers...Duplicate...then Image...Flip...

image

Go to Layers...Merge...Merge Down...
Go to Effects...Reflection Effects...Rotating mirror...
Horizontal offset=0, Vertical offset=0,
Rotation Angle=23, Edge mode=repeat

image


Step 3.
Using the Freehand Selection Tool (lasso),
Selection type=point to point, feather=0,
smoothing=0, Anti-alias=ticked,
select the bottom area of the spinning top

image

Go to Selections...Float...
flood fill the floating selection with gradient,
or use the Paintbrush if you prefer.
You can get a stronger colour by clicking more than once.
The gradient I originally used is fading spectrum by
Peggy Jentoft. I no longer have a link for this,
but you can use a gradient of your choice

I used style=Linear, Angle =24, Repeats=0 and ticked
the invert gradient box. De-select

image


Step 4.
There is a small gap in the handle

image

With Pen tool Mode=Draw lines and polygons,
Connect segments=unticked, Create on Vector=unticked,
Show nodes=unticked, width=2
Foreground colour=white, draw a short line between the
two sections to fill the gap. You can either do this on
the layer with the sinedots image, or add a new layer
first and merge down when you are happy with the join.


Step 5.
Change the palette foreground to the colour that
you want the handle to be, I used #80FF80
Use the Freehand Selection Tool (same settings as previously)
Select around the handle

image

Go to Selections...Float, and flood fill selected area.
You can fill more than once for a stronger colour
Then go to Effects...3D Effects...Inner bevel...
use these settings

width=22, smoothness=52, depth=11, ambience=0, shininess=71, angle=315, intensity=50, elevation=20

De-select

image


Step 6.
Go to Effects...3D Effects...
Drop Shadow...using these settings

vertical=2, horizontal=8, opacity=76, blur=9.9


Step 7.
There is rather a lot of wasted space surrounding
the spinning top so use the Crop Tool to select the
area that you want to use for your picture and double
click to crop. This was how much I cropped away

image


Step 8.
You can leave the background as it is if you want to,
but I flood filled mine with a gradient fill
using background #004000 and foreground #000040
style=linear, angle=0, repeats=0

image

Finish with a frame of your choice


I hope you enjoyed this tutorial.
Thankyou to my very helpful testers


Old Tuts List