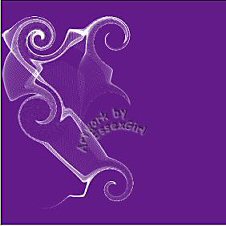
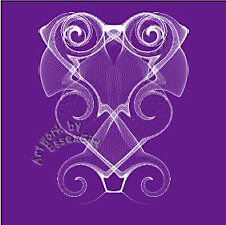
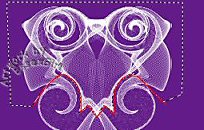
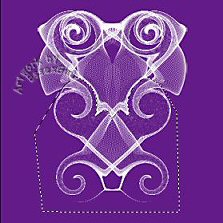
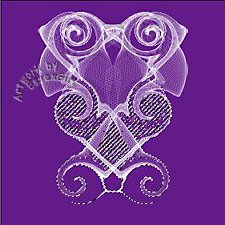
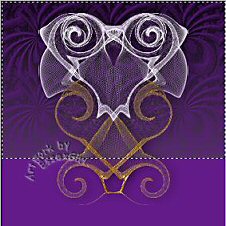
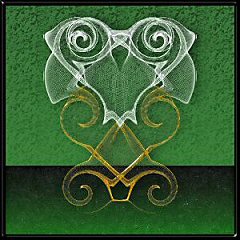
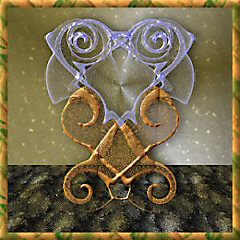
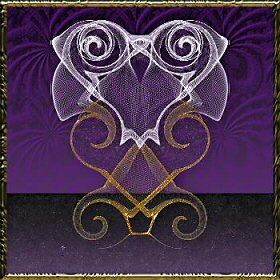
title image

Glass Owl

PSP8 and PSP9 version

image
This tutorial was created 26th August 2002©Copyright Artwork by EssexGirl
Updated for PSP8 12th March 2005
please do not copy it, or put it anywhere else without my written permission.

Filters and programs used in this tutorial :-
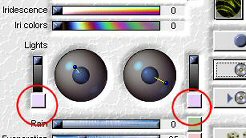
Paint Shop Pro
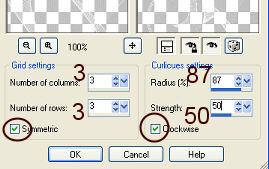
Dragonfly's Sinedots II
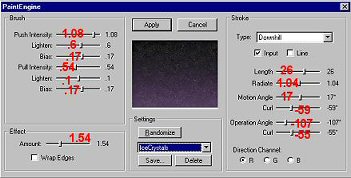
Paint Engine
Super Blade Pro (optional)

Materials :-
There is a text file included in the zip, if you don't know where to place the items.
My Owl.cfg, Selection file, SBP presets and sg_spider texture Here
I originally used Tephra's polyurethane and goldambercrackle SBP presets
in this tutorial, but they are no longer available, so I have replaced
them with my sg_smoothplastic and sg_crumpled gold which are similar

some images have been made smaller to shorten file size


Step 1.
Open a new Image 200 x 300 transparent.
I have flood fill with a dark colour so that the
sinedot image will be easier to see.
Add a new layer.
Go to Effects...Plugins...Sinedots...
Open the sg_owl.cfg and choose the magic_dust2 preset
(it's the only one in there)
If you are new to sinedots and don't know how to open
the .cfg file click HERE for more information

Some presets use different 'blend' settings and it is
important for this tutorial to make sure that the blend
in the sinedots setting is set to 'screen' like this:-

image

Click ok

image


Step 2.
Go to Image...Canvas Size...
Change the size of the canvas to 400 x 400 in the
image placement section choose the left centre square.
Your sinedots will be on one side of the image.

It needs to be positioned this way, so that when
we apply the CurlyQ's in the next step,
they will be in the correct position.

I flood filled the background layer for
the screenshots, but it doesn't really
matter if you do this or not.


Step 3.
Make sure that the layer containing your
sinedots image is active, then go to
Effects...Distortion Effects...CurlyQ's...
Use these settings

columns=3, rows=3, size=87, strength=50, clockwise

image


Step 4.
Go to Edit...Copy...(Ctrl+C)
This image is no longer needed
Open a new image 400 x 400 transparent
Flood fill with a dark colour (you can
change the colour later if you want to).

Add a new layer, then go to
Edit...Paste...and Paste as a new selection(Ctrl+E)
Postitioning the image at co-ordinates 66,20
(you can see the co-ordinates at the bottom
left of the screen). De-select.

image


Step 5.
Go to Layers...Duplicate...then Image...Mirror...

image

Go to Layers...Merge...Merge Down...
I then made my sinedots image a bit thicker by
duplicating the layer and merging down again.

The owl and his perch need to be selected seperately
for colouring. This can be a little tricky, so I
have included some selections, which you can
download from the link at the top of the page.
If you would prefer to use them go on to step 7.
If you want to make the selections
yourself go to step 6


Step 6.
Using the Freehand Selection(lasso) Tool
Selection type=point to point
Mode=Replace
Feather=0
Smoothing=0
Antialias=ticked

make a selection surounding the top part of the image,
as in the next screenshots.
You will need to work your way carefully around the
bottom edge, but you can draw anywhere on the outside
of the other edges. I have made another screenshot here
with the bottom line marked in red (not very neat I'm
afraid, but at least you can see where the line should go.

image

image

Click once in the middle of the surrounded
area and the selection will float. Go to
Selections...Save to Disk... navigate to the folder
where you keep your selections (make a new folder if
necessary) name the selection 'owl' and click save.
Your selection will then be saved for future use.

De-select. Now you need to select the bottom part of
the sinedot image in the same way as you did for the owl.
his will be a perch for your owl. The line along the join
between top and bottom will be in exactly the same place
as for the owl, but the area surrounded will be the
bottom instead of the top of the sinedot image.
The selected area should look something like this.

image

Click once in the middle of the selected area to
float it. Save it to disk in the same way that you
did for the owl, naming this selection 'perch'.
De-select.


Step 7.
Go to Selections...Load from disk...
navigate to the folder that you saved
the selections in and open the owl.sel
(if you are using my selection it is called SG_owl)

image

Go to Effects...Plugin Effects...
Flaming Pear...SuperBladePro...
Apply the sg_smoothplastic preset.

If you are going to use a different colour
background you may want to change the colour
of the lights on the setting. Just click on each of the
coloured boxes circled in the next screenshot
and choose an appropriate colour, the shade needs
to be pale, to make it seem like a reflected
colour, of course you can use a darker shade if
you want to make the glass look coloured.

image

There is an example at the end of the tutorial
where I changed the lights to green #C0FFC0 and
used a green background.

When you are happy with the colour of the lights
Apply the preset then de-select.


Step 8.
Go to Selections...Load from disk...
and open the perch.sel
(if you are using my selection it is called SG_owl_perch)

image

Apply the sg_crumpled gold preset
apply it for a second time to make
it thicker. You can use any preset that
you want to, or flood fill with a colour
or pattern if you prefer.
If you flood fill you will need to click
several times until it's thick enough.

image


Step 9.
De-select. Go to Effects...3D Effects...
and add a drop shadow with these settings

vertical=0, horizontal=6, opacity=80, blur=25.8, colour=black


Step 10.
You may want to make up your own background, but
to make the background like mine flood fill
the background layer with #A16Ab6 (you may
want to use different colours). Make the background
layer active. Activate the Selection tool, then
Click the Custom Selection icon in the toobar
and put these numbers in the dialogue box
top=0 bottom=280 left=0 right=400
Make the foreground colour of the palette #4D3858
and the background black. Change the style to
gradient. Click in the foreground and stroke properties
box and in the dialogue box choose foreground+background,
linear gradient, angle=0 with no repeats and while the
dialogue box is still open, put a tick next to textures,
from the dropdown list of textures choose sg_spider texture
Angle=0, Scale=100

Flood fill the selection.

image

Go to Selections...Invert...
Open up the forground and stroke properties box again
untick the texture, then flood fill the selection.
Go to Effects...Plugin Effects...
Fantastic Machines...Paint Engine...
I used the 'ice crystals' preset, in case
you don't have it the settings are here

image

De-select and merge all. Change the
background colour of the palette to white.
Go to Image...Add Borders...
Add a symetric border of 10
Select the border with the magic wand
and apply SuperBladePro. I used SBP's
own Gold Furnace preset.De-select and
resize if you need to, but if you resize
don't forget to sharpen the image. I use
Sharpen...Unsharp Mask...
Radius=2.00 Strength=50 Clipping=15


Here are some example using different presets

image

image

Have fun making some variations of your own


I hope you enjoyed this tutorial.
Thankyou to my very helpful testers


Old Tuts List