title image

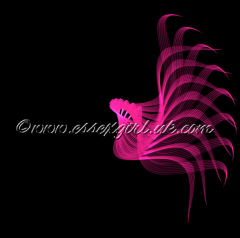
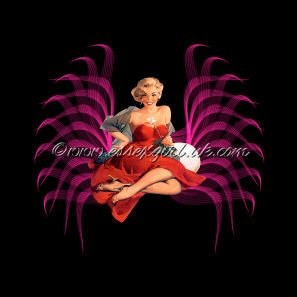
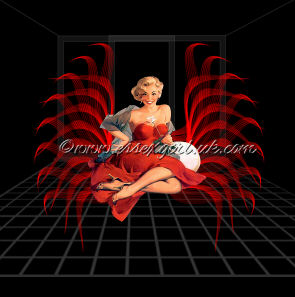
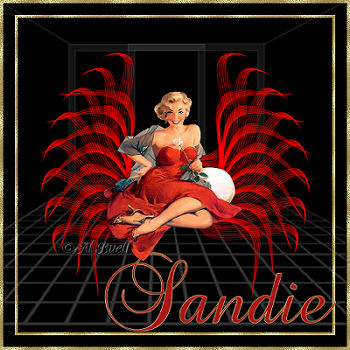
Sinedots Ornate Chair Tag

PSP9

image
This tutorial was created 7th August 2005©Copyright Artwork by EssexGirl
updated for psp9

please do not copy it, or put it anywhere else without my written permission.

Filters and programs used in this tutorial :-
Paint Shop Pro
Dragonfly's Sinedots II
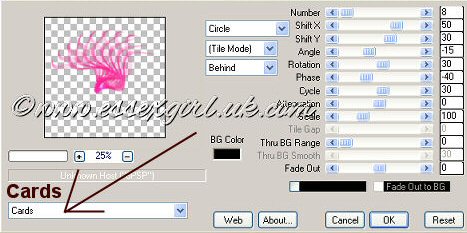
Mura Meister Copies
Super Blade Pro (optional)

Materials :-
There is a text file included in the zip, if you don't know where to place the items.
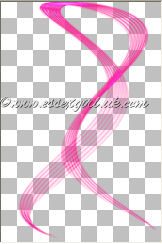
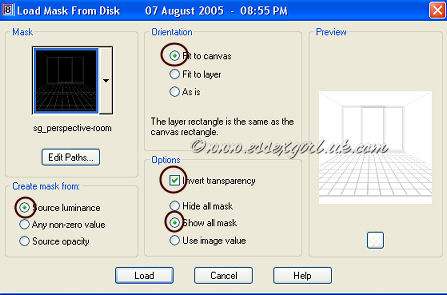
My ribbon.cfg, perspective-room mask and speckle goldfill pattern Here
OPTIONAL : My sg_silvery sparkle SBP preset Here put the preset and
bmps that go with it into SuperBladePro's Environments and Textures folder.
A tube of your choice
The tube that I have used was created from the artwork of Al Buell

Font of your choice
I have used Brock Script, which is available from DaFont.com

some images have been made smaller to shorten file size


Step 1.
Open a new image 200 x 300 pixels transparent background
Go to Layers and add a New Raster Layer naming it 'sinedots'
Go to Effects...Plugins...Dragonfly...Sinedots II...
Click on the 'open' button at the bottom of the screen

image

Use the navigation box to go to the folder where you
saved the 'ribbons.cfg' select and open it.
Click the dropdown list of presets (just above the open
button) there are a few ribbon type presets included in
this cfg. In this tutorial I am using the 'ribbon-twist',
so choose that and click OK.
(Some of the other presets are on a black background, so if
you decide to try this tutorial with one of those, you will
have to change the blend (which is just above the colour box),
to 'screen' so that the background is transparent).

image

Go to Image...Canvas Size...
Change the canvas size to 600 x 600 Lock aspect ratio=unticked
In the placement area choose the centre box.

Make the bottom layer (Raster 1) active and flood fill with
black, then make your sinedots layer active.


Step 2.
Go to Image...Flip...
Go to Effects...Plugins...Mura Meister...Copies...
Click on the dropdown list of presets
(bottom left) and choose 'Cards'

image

image


Step 3.
Go to Image...Rotate...Rotate clockwise 90

image

Use the mover tool to move the sinedots image to the
right, so that it almost touches the edge of the image

image

Go to Effects...Reflection Effects...Rotating Mirror...
Horizontal offset=0
Rotation angle=0
Edge mode=Wrap

image

Next we are going to resize the sinedots image,
without changing the size of the canvas, so
Go to Image...Resize...
With the 'Resize all layers' box unticked,
resize by 80% Resample using Bicubic.


Step 4.
Open the tube that you are going to use in psp,
Go to Edit...Copy...then go back to your image and
Go to Edit...Paste...Paste as New layer...
If you use a different tube to the one I am using you will
probably need to resize it, so make sure that the 'Resize
All Layers' box is unticked, resize to a size that you are
happy with and move into position with the mover tool.

image

Go to Effects...3D Effects...Drop Shadow
Offsets:-
Vertical=minus 3 (-3)
Horizontal=minus 3 (-3)
Opacity=50
Blur=10
Colour=Black

The pink clashes a bit with the red dress, so I decided
to change the colour of my sinedots chair, depending on
the tube you are using , you may want to leave it pink,
change to a different colour.

If you want to change the colour, make the foreground of
your materials palette the colour that you want to use.
You can either use the eye dropper to select a colour
from your tube, or use a contrasting colour if you prefer.

Open the Layers Palette and click on the padlock at the far
right of the 'sinedots' layer. It will turn blue and the X
will be removed. The transparency of the layer will be locked
so that the transparent areas will not be affected when
you flood fill the layer.

image

Make the 'sinedots' layer active, flood fill with your chosen colour, or use the paintbrush.
Unlock the transparency of the layer by clicking the padlock again
to replace the X.


Step 5.
This step is optional

If you want to add a silvery effect to the sinedots (see the
green version at the end of the tutorial), you can apply a
SuperBladePro preset, if you don't want to apply the silver
go on to the next step.

Your sinedots layer should still be active.
Go to Selections...Select All...then
Selections...Float...
Go to Effects...Plugins...SuperbladePro...
Apply the sg_silvery sparkle preset
De-select


Step 6.
If you want to make the sinedots image stronger you can duplicate
the layer, then go to Layers...Merge...Merge down...I thought this
was better, but it's a matter for personal choice.

Add a drop shadow to the sinedots image using the same
settings that you did for the tube.

Add a new layer, flood fill with white, then go to
Layers...Arrange...Send to Bottom
Make your black layer (Raster 1) active
Go to Layers...Load/Save Mask...Load Mask from Disk...
Choose the sg_perspective-room mask
with these settings

Create mask from Source Luminance, Orinetation=fit to Canvas, Options=Invert Mask Transparency and Show all Mask

image

Right click on Group - Raster 1 in the layer
palette and choose Merge Group

Step 7.
Add a new layer naming it 'border'
Go to Selections...Select All...then
Selections...Modify...Select Selection Borders...
Inside, border width=5, antialias=unticked
You should have a selection 5 pixels wide around the edge of
your image. Change the Foreground and Stroke Properties on
your materials palette to 'pattern' and choose the
speckle goldfill pattern angle=0, scale=100, Texture=unticked.
Flood fill the selected border.

Go to Selections...Invert...then
Selections...Modify...Contract...20 pixels
Selections...Modify...Select Selection Borders...
Inside, border width=5, antialias=unticked
Flood fill the selection with speckle goldfill

image


Step 8.
Finish by adding your text in a colour and font of your choice.
I usually create as a Vector and then convert to Raster when I
am satisfied with the size and position, but you can add a new layer
and create as Floating text if you prefer to do it that way.

I have used the gold speckle pattern for the foreground and red
for the background of the materials palette. Font=Brock Script
Size=100
Stroke=1 pixel

When you are happy with your text apply a drop shadow using the
same settings as you used on the tube and sinedots.
Add a new layer for any copyright information you want to add
Merge all and Resize to suit, Resample using Bicubic.


I hope you enjoyed this tutorial.


Old Tuts List