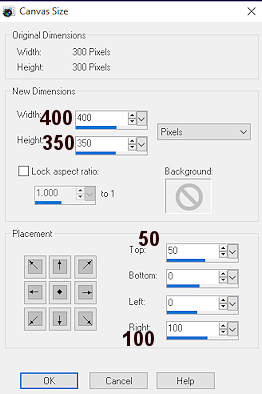
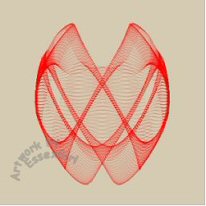
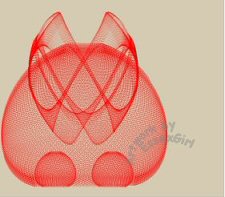
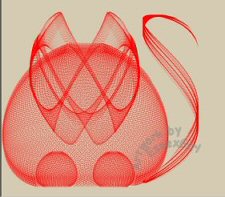
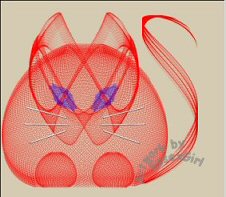
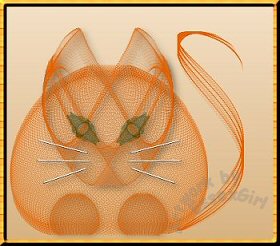
title-image

Cat Tutorial
PSP X2

image
This tutorial was created 18th December 2001
©Copyright Artwork by EssexGirl
please do not copy it, or put it anywhere else without my written permission.
Updated for PSP X2

Filters and programs used in this tutorial:-
Paint Shop Pro
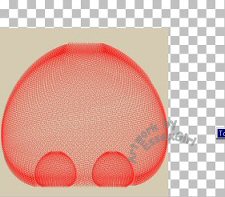
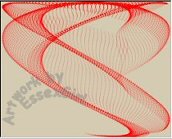
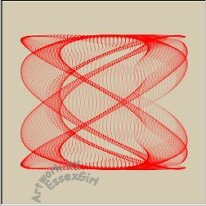
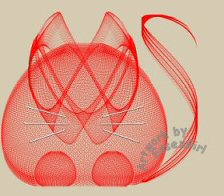
Dragonfly's Sinedots II filter you can get

Materials:-
There is a text file included in the zip, if you don't know where to place the items.
My sg_cat.cfg Here
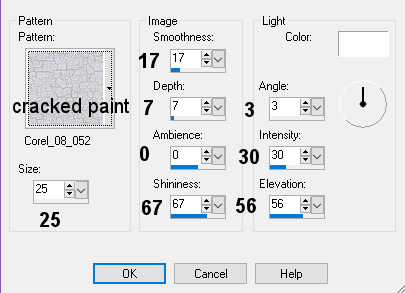
Corel_08_052.jpg (cracked paint) you'll only need this if your version of psp hasn't
got it in the patterns folder.

some images have been made smaller to shorten file size


step 1.
Open a new image 300 x 300 transparent
this is for the body, flood fill with the colour
you want for your background (it can be changed at
the end if you want. Add a new layer


Step 2.
Go to Effects...Plugins...Sinedots
open the sg_cat.cfg, choose the cat_body pre-set
if you are new to sinedots and don't know how to open
the .cfg file click HERE for more information

Some presets use different 'blend' settings and it is
important for this tutorial to make sure that the blend
in the sinedots setting is set to 'screen' like this:-

image

image

Rename the layer 'body'


Step 3.
For the feet I used the same shape, but made it smaller,
Go to Layers...Duplicate...then to Image...Resize
Resize by 25% Bicubic making sure that the 'all layers'
box is not ticked

use the Mover tool to position the first foot like this

image

Go to Layers...Duplicate...Then Image...Mirror
Go to Layers...Merge... Merge Down...
Rename this layer 'feet'

image


Step 5.
More space will be needed to fit in the head and tail
Go to Image...Canvas...
and change the canvas size with these settings

width=400, height=350, top=50, bottom=0, left=0, right=100

This is what you should now have

image

go to the background layer and flood fill the empty space
with the background colour


Step 5.
To make the head open a new Image 250 x200 transparent
Flood fill.
Add a new layer

Effects...Plugins...Sinedots...
choose the magic_dust pre-set
Make sure that the blend box is set to 'screen'
this is my screenshot

image


Step 6.
Go to Layers...Duplicate...then Image... Flip
Layers...Merge...Merge Down...

The canvas size needs to be made larger before the
next step, so go to Image...Canvas size... use these settings

width=300, height=300, centre bos=ticked, top=50, bottom=50, left=25, right=25

Then go to the background layer and flood fill the empty space with the background colour.

image


Step 7.
Go to the top layer
Image...Free Rotate... and rotate 90° left
Here's what you should have

image

Now it needs a bit more shape so go to
Effects...Geometric effects...Circle

image


Step 8.
There are some small parts of the image that
are not needed I used the freehand slection (lasso) tool
(selection type point to point) to draw round them
and then pressed the delete key, but if you prefer,
you can use the eraser tool. You can zoom in to make it
easier to see if you need to.
The following two pictures show the parts to be deleted
(or erased). If you use the freehand selection tool method
you can draw around all the sections to be deleted by
holding down the shift key while drawing, so that they are
all selected at the same time, then hitting delete once,
or by drawing and deleting each part seperately
there is one section each side at the bottom

image

and one each side plus a piece at the centre top

image

This is what you should now have

image

Rename the layer 'head'


Step 9.
Now the head can be moved to the main image, so go to
Edit...Copy... this image isn't needed any more.
Go back to the body image add a new layer
Edit...Paste... paste as a new selection positioning
the head as in the picture
Rename the layer 'head'

image


Step 10. Next a tail is added
open a new Image 100 x 300
I didn't bother to flood fill this time
Go to Effects...Plugins...Sinedots...
choose the cats_tail pre-set and click ok
Making sure that the blend box is set to 'screen'
Go to Image...Mirror...

image

then Edit..Copy
this image is no longer needed


Step 11.
Now it's back to the body image again, go to the
background layer,add a new layer and name it 'tail'

Edit... Paste...paste as a new selection, positioning
the tail as in the picture

image


Step 12.
To give him some whiskers go to the head layer. You can create the
whiskers on a vector layer if you prefer, but I used a raster layer.

Add a new layer
Make the foreground on you palette white and the background transparent
Use the pen tool with these settings
Line style=solid
width=2
antialias= ticked
connect segments= unticked
Create On Vector= unticked
Show nodes= ticked

draw 3 whiskers on one side and 3 on the other
When I did mine I drew the three on one layer
then duplicated the layer, mirrored, moved the
second side into position with the mover tool,
then with the top one active merged down. When all the
whiskers are on one layer rename the layer 'whiskers


Step 13.
This step is optional, you could leave the whiskers as
they are, or add an inner bevel if you prefer
Go to Effects...Textured effects...Sculpture
and use these settings

pattern=2, size=25, smoothness=17, depth=7, ambience=0, shininess=67, angle=3, intensity=30, elevation=56

here is my cat so far

image


Step 14.
I used a sinedots preset for his eyes
Open a new Image 80 x 50 transparent
go to Effects...Plugins...Dragonfly...Sinedots 11...
choose the catseye pre-set and click ok

image

Edit...Copy...this image isn't needed any more


Step 15.
Go back to the cat and paste as a new layer, then to
Image...Free Rotate... and making sure that the 'all layers'
box is not ticked rotate 45° left
move into position with the Mover tool

image


Step 16
For the other eye, you can either repeat step 17, rotating
to the right, or you can duplicate the layer, mirror and
move the second eye into position with the Mover tool

Merge the two eye kayers together Layers...Merge...Merge Down...
Rename the layer 'eyes'

image


Step 17.
If you want to keep the cat red you can skip this step
I wanted a ginger cat. You may have your own favourite
way of colouring, this is how I did mine
Go to Adjust...Hue and Saturation...Hue/Saturation/Lightness
These were the settings I used

hue=98, saturation=0, lightness=14

Alternatively you could go to Adjust...Hue and Saturation...Colourize
Or you could try going to Adjust...Colour... Red/Green/Blue
I haven't tried this yet, but experiment and find something that
you like, but make a note of the setting used, because the head,
feet, body and tail layers will want the same setting and unless
you want an odd eyed cat they eyes will need to be the same as
each other. Here's my cat after colouring

image


Step 18.
Make sure you are on the 'head' layer and add a new layer.
Name the layer 'mouth'

To make his mouth there are 2 methods you can use, so pick the
one that you find easiest. Make the palette foreground and background
the same colour as the cat. the first method uses the Preset Shapes tool

triangle, width=1, antialias ticked
(the screenshot for this setting is is from PSP7)

Make a small triangle to fit between the two curves of his top lip
you can move it into position with the mover tool. To blend the
mouth in better with the rest of the cat I lowered the opacity
of the mouth to 60 on the layer palette

image

The second method uses the Freerhand Selection Tool...Point to Point... Feather= 0, Smoothing = 0, anti alias = Ticked
Select a small triangle to fit between the two curves of his top lip

image

Flood fill with the colour of your cat, then lower the opacity
of the mouth to 60 on the layer palette


Step 19.
To give him a slightly more three dimensional look I turned off
the visibility of the body, feet, tail and background layers
by clicking on the eyes for those layers in the layers palette
so only the head, mouth eyes and whiskers layers are visible
Go to Layers...Merge...Merge Visible...
Then Layers...View...Veiw All

Now give the merged layer a drop shadow
using these settings

vertical=5, horizontal=5, opacity=75, blur=15

I also gave a drop shadow to the 'feet' layer, but changed
the vertical and horizontal setting to 1


Step 20.
If you want to change the colour of the background
go to that layer and flood fill. I used a gradient fill
with two different shades of the same colour.
Merge all and add any frame you want,
then resize if you need to.


I hope you enjoyed this tutorial.
I would like to give a big to all my testers


Old Tuts List