title image

Multiple Masked Image

PSP X8

image

This tutorial was created 2nd March. 2012 ©Copyright Artwork by EssexGirl
please do not copy it, or put it anywhere else without my written permission.
Originally written using PSPX updated using PSP X8

Filters and programs used in this tutorial :-
Paint Shop Pro

Materials :-
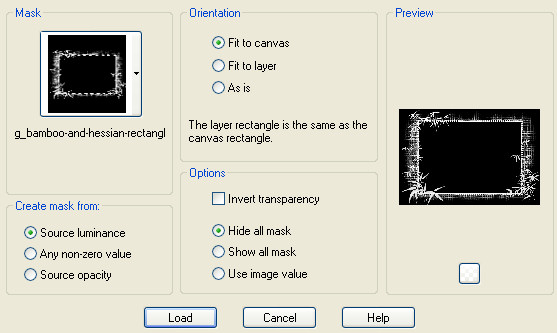
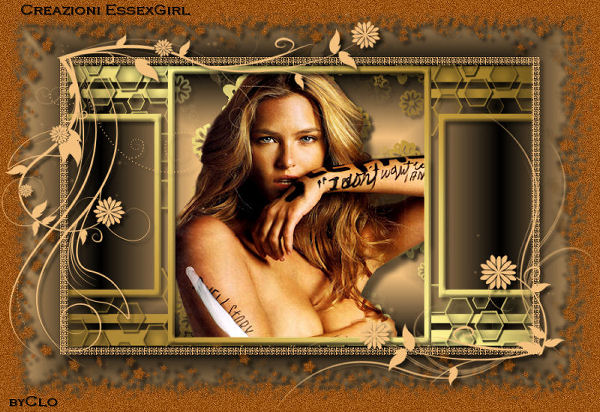
Masks and gold gradient used in this tutorial, the tube I used is also included in my supplies
zip, with permission from the tube creator, thankyou Clo for allowing me to include it. HERE
There are also some extra masks you can use HERE or you can
download them individually from page 42 of my masks Here

You can use tube of your choice instead of the one supplied if you want to.
I received the tube I used from the tube group TubesPSP-LuzCristina
More tubes by Clo can also be found at her tutorial site Il Mio Universo

Images have been made smaller to shorten file size.


Step 1.
Preparation
Put the masks into your masks folder - in this tutorial some of the masks
will be applied to a partially filled layer, so the method of having them
open and applying the mask from the image will not work.
Put the gold gradient in your gradients folder - alternatively you can use a
gradient of your own, or you could use a gold pattern instead

Choose a light colour and a dark colour for the foreground and background of
your materials palette.
I used #70b000 for the foreground and #004000 for the background

image


Step 2.
Open a new image 800 X 550 transparent and flood fill with your dark colour.
Go to Layers...New Raster Layer... and flood fill with your light colour

Go to Layers...Load/Save Mask... Load Mask from Disk...
Choose the sg_bamboo-and-hessian-rectangle
(you will find several other masks that you can use in the extra
zip, or you can use suitable masks of your own if you prefer)
Orientation - Fit to Canvas
Create mask from - Source luminance
Options - Hide all mask
Invert transparency = unticked

image

image

Go to Layers... Merge... Merge Group...
Rename the layer 'bamboo frame'


Step 3.
Use the Selection Tool with these settings
Selection type = Rectangle
Mode = Replace
Feather = 0
Anti-alias = unticked
Select around the rectangle in the centre of the image.

image

Go to Layers... New Raster Layer...

Change the foreground of you palette to the sg_gold gradient,
(or the gradient of your choice), using these settings
Style = Linear
Angle = 45
Repeats = 0
Invert = unticked
Flood fill the selected rectangle with the gradient and deselect.

image


Step 4.
Go to Layers...Load/Save Mask... Load Mask from Disk...
Choose the sg_flower-backed
Change the Orientation to - Fit to Layer
Create mask from - Source luminance
Options - Hide all mask
Invert transparency = unticked

image

image

Go to Layers... Merge... Merge Group...
Rename the layer 'gold frame'
Go to Layers...Arrange...Move Down


Step 5.
Use the magic wand with these settings
Mode = Replace
Match mode = RGB Value
Tolerance = 0
Use all layers = unticked
Contiguous = ticked
Feather = 0
Anti-alias = unticked

Select the center rectangle.
If you prefer you can use the rectangle selection tool to
make the selection in the same way as in step 3
Go to Selections... Modify... Expand...
Expand the selection by 1 pixel

image

Add a new layer and flood fill the selection with the gold gradient but
don't deselect yet, as we will need this selection again later

image

Go to Selections... Load/Save Selection... Save Selection to Alpha Channel...
and save the selection, it doesn't matter what you name it. Now you can deselect


Step 6.
Go to Layers...Load/Save Mask... Load Mask from Disk...
Choose the sg_geometric-texture6
(use the same settings as last time)
Orientation to - Fit to Layer
Create mask from - Source luminance
Options - Hide all mask
Invert transparency = unticked

image

Go to Layers... Merge... Merge Group...
Rename the layer 'gold texture'
Layers... Arrange... Move Down


Step 7.
Change the backround colour on your palette to Black (#000000)
The foreground should still be your light colour
Change the gradient to Foreground-background gradient
(feel free to use other gradients and settings)
Style = Rectangular
Angle = 0
Repeats = 2
Invert = ticked
Horizontal = 50
Vertical = 50

Add a new layer
Floodfill the layer with the gradient

image

Go to Layers... Arrange... Send to Bottom...
the layer will be hidden under Raster 1 for now.
Go to the layer Raster 1 (the one filled with your dark colour)
Go to Adjust... Add/Remove Noise... Add Noise...
Gaussian - Monochrome - 20


Step 8.
Go to Layers...Load/Save Mask... Load Mask from Disk...
Choose the sg_leafedge
Orientation to - Fit to Layer
Create mask from - Source luminance
Options - Hide all mask
Invert transparency = unticked

image

Go to Layers... Merge... Merge Group...


Step 9.
Go to Effects... 3D Effects... Drop Shadow...
Vertical = 5
Horizontal = 5
Opacity = 57
Blur = 5

Apply the same drop shadow on the gold texture layer,
on the gold frame layer and the bamboo frame layer.
On the Raster 1 layer I repeated the drop shadow using minus 5 (-5) for the
vertical and horizontal settings, but I didn't do this on the other layers.

image


Step 10.
Go to the top layer of your image (the bamboo frame layer)

Open your tube, go to Edit... Copy...
On your main image go to
Edit...Paste As New Layer...

The tube will need to be resized so that it fits into the center frame,
if after resizing some of the edges go outside the frame area, we will be
able to delete them using the selection that we saved earlier

Go to Image... Resize...
The amount of resizing will depend on the tube you use and on the size
of the centre space on the mask you used, so you will need to experiment.

Resample using Bicubic
Maintain original print size=unticked
Lock aspect ratio=ticked
Resize all layers=unticked

My tube was still slightly larger than the rectangle, the excess can
easily be removed, but before we do that add a drop shadow to the tube,
then any shadow on the tube that goes outside the frame will be deleted too.
Effects... 3D Effects... Drop Shadow...
Vertical = 10
Horizontal = 10
Opacity = 57
Blur = 10


Step 11.
Move the tube into position with the Mover Tool, I moved mine slightly to the left
Go to Selections... Load/Save Selection... Load Selection From Alpha Channel...
Load the selection that you saved in step 4

image

Go to Selections... Invert...
Then press the delete key on your keyboard
Deselect
Go to Layers...Arrange...Move Down...
Repeat the move down once
Your tube should be between the gold texture and the gold frame layers
Merge All and save as a .jpg


Here are examples using some of the masks provided in the
extra zip and using different colours, gradients and tubes.

image

image

The last example was created by Clo

image


To see my other tutorials click Here

I hope you enjoyed this tutorial.

To see my other tutorials click Here


If you wish to contact me you can find an email address to use included on my Site Map

Home