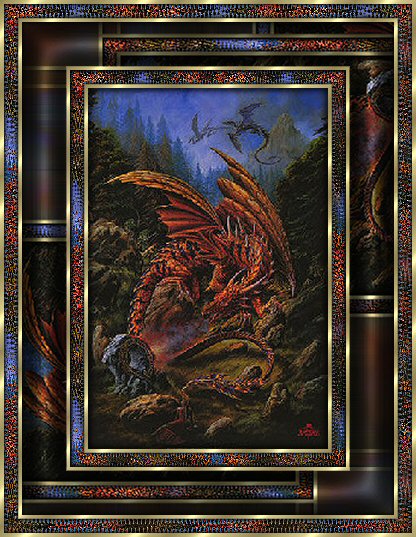
The above frame is what we will be making.
This is what is needed to complete this tutorial:-
Paint Shop Pro Version 9 (although you can do it with 8 as well)
- An image of your choice, or you can use the one I used.
Just right click on it and save as.

This gold texture, again just right click and save to your
textures folder on your computer.

Let’s get started
1. Open your image and gold texture to your PSP workspace.
Minimize the gold texture and duplicate your image twice.
Close the original image.
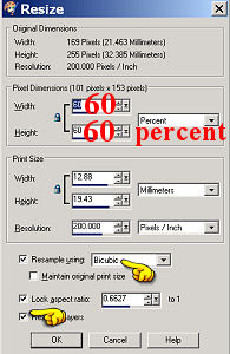
2. On one of your duplicated images,
go to Image>>Resize and resize your image to 60%;
Resample using Bicubic and Resize all layers is ticked.
3. Go to Effects>>Image Effects>>Seamless Tiling
and use the default settings.
4. Minimize that image; we will be using it later on.
5. Now, with your other duplicated image,
go to Image>>Add borders and use Symmetric 4
Color: White (or a color NOT in your image).
6. With your Magic Wand using these settings,
select your white border:
Mode: Replace
Match Mode: RGB Value
Tolerance: 0
Sample Merged: Unticked
Contiguous: Ticked
Feather: 0
Anti-Alias: Ticked
Outside
7. Load your D_gold fold texture into your
FOREGROUND styles box with angle: 0 Scale: 100
8. Flood fill your border with the gold texture.
9. Go to Selections>>Invert
10. Go to Effects>>3D Effects>>Cutout
and use these settings:
Vertical: 0
Horizontal: 0
Opacity: 100
Blur: 12.5
Color: Black
11. Go to Edit>>Repeat Cutout. Deselect (ctrl D)
12. Go to Image>>Add Borders and change the 4
to Symmetric 14 Color: White
13. With your Magic Wand (same settings) select your
white border.
14. Load your seamless tile we made
earlier into your BACKGROUND styles box.
Angle: 0 Scale: 100
15. With your Flood Fill Tool, right click
onto your selected border
16. Go to Effects>>Distortion Effects>>Wave
and use these settings:
Horizontal Amplitude: 1
Horizontal Wavelength: 1
Vertical Amplitude: 1
Vertical Wavelength: 1
Color: Ticked (I used 4D5C77)
17. Go to Adjust>>Sharpness>> Unsharp Mask
and use the default settings.
18. Go to Effects>>3D Effects>>Cutout (DO NOT invert)
and use the same settings as before EXCEPT change
the blur to 6.
19. Go to Edit>>Repeat Cutout. Deselect.
20. Go to Image>>Add Borders and change it back to
Symmetric 4 Color: White
(or a color NOT in your image)
Repeat steps 6 through 11.
21. Go to Image>>Add Borders and change it
to Symmetric 44 Color: White
22. Select your border with the Magic
Wand Flood fill
with your seamless tile image (it should still be
in your background styles box, Right click to fill)
23. Go to Adjust>>Blur>>Gaussian Blur and
put 10 in the Radius Box
24. Go to Effects>>Distortion Effects>>Wind
and use these settings:
Wind Direction: From Left
Wind Strength: 100
25. Go to Effects>>Distortion Effects>>Wind and change
the wind direction to: From Right.
Wind Strength stays at 100. DO NOT deselect yet.
26. Go to Effects>>Reflection Effects>>Rotating Mirror
and use these settings:
Horizontal Offset: -50 (minus 50)
Vertical Offset: 0
Rotation Angle: 315
Reflect: Ticked
27. Go to Effects>>Reflection Effects>>Rotating Mirror
and use these settings:
Horizontal Offset: 50
Vertical Offset: 0
Rotation Angle: 135
Reflect: Ticked
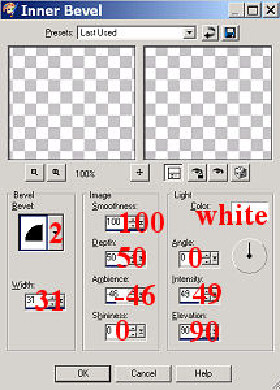
28. Go to Effects>>3D Effects>>Inner Bevel
and use these settings:
29. Go to Edit>>Repeat Inner Bevel. Deselect.
30. Repeat steps 5 through 20 (you will still be
working on the same image).
31. Resize your framed image to a size that
suits you and save as .jpg.
I hope you enjoyed this tutorial as much
as I enjoyed writing it!
Back to Kat's tutorial index
Here