title image

Frosted Glass Tag

PSP X8

This tutorial was written April 29th 2007
by Sandie © Artwork by EssexGirl, Updated for PSP X8 30th April 2016 All Rights Reserved.
Please do not copy it, or put it anywhere else without my written permission.
image

Filters and programs used in this tutorial :-
Paint Shop Pro
Mura Seamless Shift at Zigzag
Solidify from Flaming Pear

Materials :-
A tube of your choice
Silver pattern of your choice
Wordart (optional)
I have included the silverbead pattern, tube
and wordart that I used in the zip Here
Step 1.
Open the silverbead pattern, or silver pattern of your choice and minimise it
It will be available to use as a pattern in your materials palette
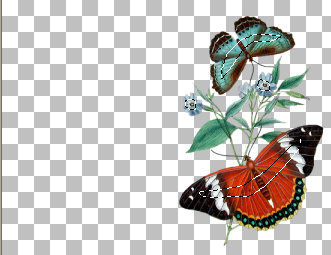
Open the tube you are going to use and go to Edit... Copy....

Open a new transparent Raster background Image 850 x 650
Go to Edit... Paste as a new layer...
If necessary resize your tube by going to Image... Resize...
Make sure the 'All Layers box is unticked.
The amount of resizing you need will depend on the size of your tube

Use the Mover Tool to position your tube where you want it
I moved mine to the right side of the image.

Go to Layers...Duplicate...
Hide the top layer by clicking the eye on the layers palette
and make the original tube layer active (highlighted)

Use the Freehand Selection Tool
Selection type=Point to point
Mode=Add
Feather=0
Smoothing=0
Antialias=ticked
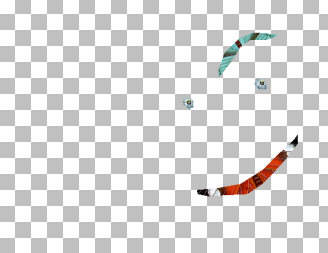
We want to select some of the colours from your
tube, so select some nice coloured areas.
You should have something similar to this

title image


Step 2.
Go to Selections Invert...
then hit the delete key on your keyboard.

Deselect
You should have something similar to this, it doesn't matter
if your peices of colour from the tube are larger or smaller

title image


Step 3.
Go to Effects...Plugins...Flaming Pear....Solidify B
(you can use Solidify, or Solidfy A if you prefer)
Yours won't be exactly the same, because the result depends
on the tube you are using and the areas that you selected,
but you should have something similar to this.

title image


Step 4.
Go to Effects...Artistic Effects...Topography...
use these settings :-
Width=61
Angle=271
Density=25
Colour=#13451F

title image


Step 5.
Go to Effects...Plugins...Mura Seamless...Shift at Zigzag...
Number=200
Shift=35
Offset=0
Ratio=128
Slope=255
Direction=0

title image


Step 6.
Go to Layers...Duplicate...
Then Image...Flip...Flip Vertical(in PSP X Flip)
Open the Layers palette and change the Blend Mode of the layer
This is the result I got with the Blend Mode changed to 'Overlay'

title image

This is the result I got with the Blend Mode changed to 'Screen'

title image

Your results are going to be different to mine, especially if you
used a different tube, so try all of the blend modes and choose
whichever one you like best. Alternatively you could lower the
transparency of the layer to 50 instead

I am going to use the lighter image


Step 7.
Unhide the layer containing your tube, by click the eye on the
layer palette again and make this the active layer

Add a drop shadow to your tube
Effects...3D Effects...Drop Shadow...
Vertical=3
Horizontal=-6 (minus 6)
opacity=45
Blur=10
(or shadow of your choice)

title image


Step 8.
Go to Layers...Merge...Merge All...
Selections...Select All...
Go to Effects...3D Effects...Cutout... use these settings:-
Horizontal and Vertical=0
Opacity=75
Blur=15
Colour=Black

Go to Image...Add Borders...
Symmetric=ticked
borders=3
colour=any

Go to Selections...Invert...
Make the foreground and Stroke Properties of your
palette Pattern and choose the silverbead pattern
Flood fill the selected border, then Deselect


Step 9.
At this point you can add any text or Wordart to your image
that you want. I added a wordart quote which I created, it
is included in the materials zip file if you wish to use it.

If you are using a wordart tube and want to change the colour
Lock the transparency of the layer by opening the layers
palette and clicking the padlock. You can then flood fill or paint, in
your colour of choice, the transparent areas will be protected.

Remember to unlock the padlock when you have finished, otherwise
you won't be able to add a drop shadow, or move your wordart to
another part of the image if you need to.

When you are happy with your text, or Wordart apply a drop shadow
using the same settings as you used on your tube (step 7).


Step 10.
Resize if necessary, Resample using Bicubic.
The size you want will depend on whether you are
using your image as a tag, or for a stationery header.

Here is another example using a different tube

title image


To see my other tutorials click Here


If you wish to contact me you can find an email address to use included on my Site Map
Home