title image

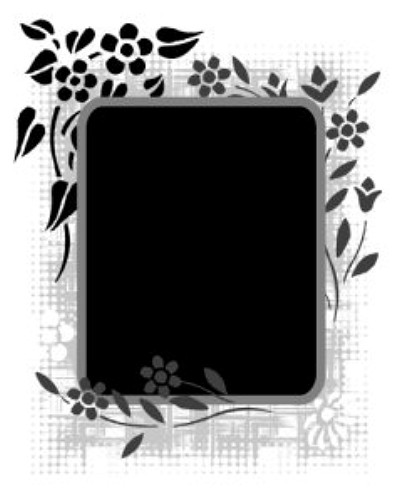
Importing Brushes and
Creating a Mask

PSP X

image
This tutorial was created September 15th 2007 © Artwork by EssexGirl
please do not copy it, or put it anywhere else without my written permission.

Filters and programs used in this tutorial :-
Paint Shop Pro

Materials :-
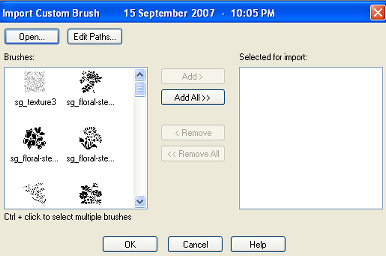
My brush files Here I have included lots of extra flower
stencil brushes and an extra couple of texture brushes in the zip
Unzip into a temporary folder, we will import them into psp in step 1
once they have been imported you can delete the temporary folder

some images have been made smaller to shorten file size


Step 1.
First we will import the brushes (sometimes you can
just put them in your brushes folder, but they don't
always work that way, so it is better to import them).

Go to File...Import...Custom Brush....
Click 'Open' and use the navigation box to go to the temporary
folder where you unzipped my brushes (from the materials download)
and select all of the brushes (Ctrl+A)

Click on 'Open' the brushes will appear in the left
window of the dialog box.

image

Click 'Add All', or just select the ones you want and
click 'Add' The brushes will move to the right window,
then click OK to import them.


step 2.
Open a new image 400x500
Flood fill with White
Add a new layer
Use the Preset Shapes Tool - Rounded Rectangle
Create on Vector=unticked
(you can create on vector if you prefer)
width=10
Make the background of your palette black (#000000)
and the foreground medium grey (#808080)
Create a rectangle in the centre of your image, the size is up to
you, but leave some space around the outside for the brushwork

image


Step 3.
Next we will add a bit of texture around the rectangle (this is
optional, you can leave it plain if you want to).

Go to Layers...New Raster Layer, this needs to be moved below the rectangle,
so go to Layers...Arrange...Move Down...
Change your foreground colour to light grey (#c0c0c0 or #808080)
Select the Brush Tool
choose the sg_texture1 brush (or a brush of your choice)
Size=430
Step-32
Density=100
Rotation=0
Opacity=100

Click with the brush in the centre of your image

image

(if you are using a brush that is smaller than your rectange, you can
either increase it's size, or place the brushstroke in several places,
so that they show around the edge of the rectangle)


Step 4.
Now we will add the brush decoration. I have used some floral stencil brushes
that I created from fonts (included in the download zip), but you can use
any brushes, so feel free to experiment with whatever you have.
The positions that I have placed my brushes in are just guidelines for how I
created this particular mask, you can place your brushmarks wherever tou want.

You can use black and white and any shade of grey, I will state the html code
for the colours I used, but you don't have to use the same ones.
Each brushmark should be placed on a seperate layer, so that you can move
them easily using the Mover Tool, it also means that you can move the layers
above, or below the rectangle to see which suits your design best.

Add a new layer
Change the brush to sg_floral-stencil15
I used the default settings
Change the foreground colour to black (#000000)
Click once with the brush in the top left corner of the image
You can use the Mover Tool to reposition if necessary

image


Step 5.
Add a new layer
Change the brush to sg_floral-stencil17
I used the default settings
Change the foreground colour to dark grey (#404040)
I placed this brushstroke in the top right corner of
the image, slightly lower than the previous one.

image


Step 7.
Add a new layer
Change the brush to sg_floral-stencil122
Change the rotation setting to 270 (or 90 if you like it better
that way around), the other settings stay as default.
I used the same colour as the previous brush (#404040)
Place this brushstroke at the bottom
I moved this layer to the top
Layers...Arrange...Bring to Top...
and I used the mover tool to move the brushstroke,
slightly to the left and overlapping the rectangle

image


Step 8.
To finish I added a couple of white flowers
Add a new layer
Change the brush to sg_single-flower1
I used the default settings
Change the foreground colour to white (#ffffff)
place a brushstroke at the lower left side of the image

Change the brush to sg_single-flower4
Place a brushstroke in the bottom right corner.

image


Step 9.
Optional:-
For a slightly different effect you could add some inner bevels
Make the layer with your rectangle on active
Use the Magic Wand to select the grey edge of the rectangle
Go to Effects...3D effects...Inner Bevel...
Use these settings (or settings of your choice)

image

Apply the same inner bevel to each of the flower brush layers

image


Step 10.
Go to Layers...Merge...Merge visible...
Layers...New Mask...From Image...
The Source Window should be your image (if you have
nothing else open it will be the only option available)
Create mask from Source luminance
Layers...Load/Save Mask...Save Mask to Disk...
Give it a name and click on save.


I hope you enjoyed this tutorial.
Thankyou to my great testers

To see my other tutorials click Here


If you wish to contact me you can find an email address to use included on my Site Map

Home